Query Designer
In This Topic...
The Query Designer allows custom queries to be created directly from system data. The designer provides full control over data columns, aggregate functions, filtering, grouping, and sorting. Queries can be saved for future use, and modified as necessary.
Query Editor Panel
The Query Editor panel opens to the right of the screen when selecting Query from the Dashboard group. Click X to close the panel again.
The options are divided into groups, depending on which feature opened the panel.
New Query
This group is used to create new custom queries.
To create a new custom query, select a Topic and click Create Query. The available topics are custom to your SmartView implementation. For details on the purpose and usage of each topic, please contact your system administrator.
On creating a new query, the Query Designer window opens.
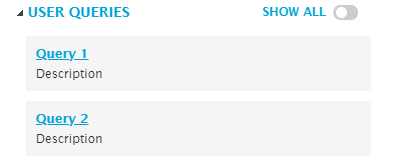
User Queries
This group is used to open an existing custom query saved in the system.
The Show All switch currently has no effect.
Click a name to open the query. The Query Designer window opens.
Query Designer Window
The main screen of the Query Designer tool is used to manage the selected columns, criteria, and sorting.
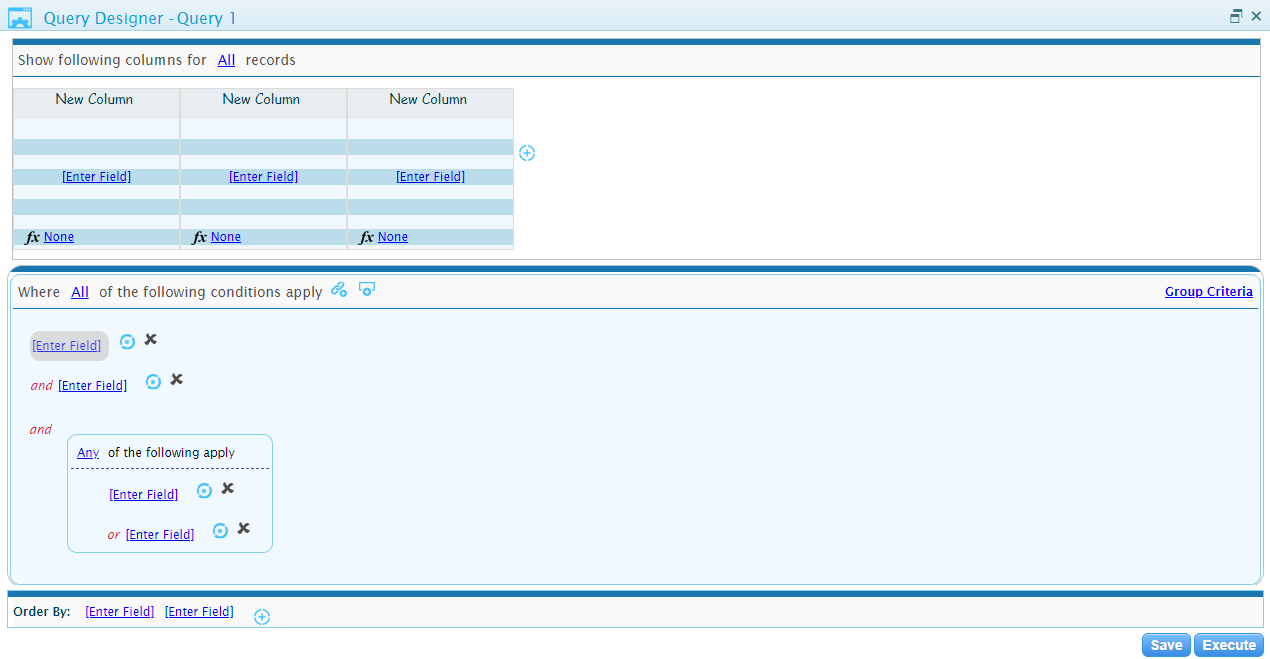
The window is composed of three sections, Column Management, Criteria Management, and Sorting Controls. The window can be minimized, maximized (the default appearance), and resized with the standard controls. Click X to close the window.
Click Save to open the Save Query panel.
Click Execute to view the Query Results.
Column Management
The column management section is used to select the columns to be included in the query, and define any aggregate functions.
At the top of the section, configure how many records should be included in the query.
The column detail panels display the settings for each column included in the query. Click the Append Column icon ![]() to add a column.
to add a column.
Click [enter field] to select a column from those available in the topic.
Aggregate functions can be applied in the ƒx field. Some functions might not be available if they cannot be applied to the current data type.
When hovering the mouse over a column detail panel, a control bar appears near the top of the panel.
Record Criteria
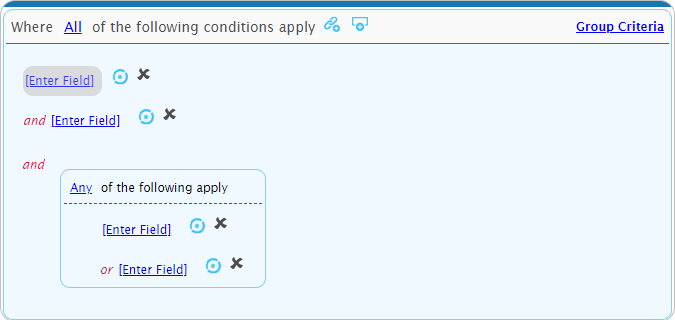
Criteria can be applied to restrict the records included in the query.
At the top of the section, the Where field defines how the criteria should be applied.
To add filter criteria, click the Add Criteria icon ![]() to add a top-level criteria, or click the Add Group icon
to add a top-level criteria, or click the Add Group icon ![]() to add a group of criteria. The criteria structure is displayed in the window.
to add a group of criteria. The criteria structure is displayed in the window.

- Click Enter Field to select the field for the comparison. Once a field has been selected, click the field name to select a different field.
-
Click the second field to select the comparison type, and provide any necessary comparison values. Some comparison types may not be available due to the data type.
Checks if the field value is less than one or more provided values. Click Enter Value to provide the comparison value. If multiple values are specified, select if the field value must be less than Any comparison value, or All comparison values. Click the Add Value icon  to add additional comparison values. To delete a comparison value, hover over the value and click the Delete icon
  .
.Checks if the field value is less than or equal to one or more provided values. Click Enter Value to provide the comparison value. If multiple values are specified, select if the field value must be less than or equal to Any comparison value, or All comparison values. Click the Add Value icon  to add additional comparison values. To delete a comparison value, hover over the value and click the Delete icon
  .
.Checks if the field value is equal to a provided value. Click Enter Value to provide the comparison value. Checks if the field value is not equal to a provided value. Click Enter Value to provide the comparison value. Checks if the field value is greater than one or more provided values. Click Enter Value to provide the comparison value. If multiple values are specified, select if the field value must be greater than Any comparison value, or All comparison values. Click the Add Value icon  to add additional comparison values. To delete a comparison value, hover over the value and click the Delete icon
  .
.Checks if the field value is greater than or equal to one or more provided values. Click Enter Value to provide the comparison value. If multiple values are specified, select if the field value must be greater than or equal to Any comparison value, or All comparison values. Click the Add Value icon  to add additional comparison values. To delete a comparison value, hover over the value and click the Delete icon
  .
.Checks if the field is empty. No other configuration is necessary for this comparison. Checks if the field is not empty. No other configuration is necessary for this comparison. Checks if the field value is between two provided values. Click Enter Value to provide each comparison value. Checks if the field value is not between two provided values. Click Enter Value to provide each comparison value. Checks if the field value matches one or more provided values. Click Enter Value to provide each comparison value. Select if the field value must match Any comparison value, or All comparison values. Click the Add Value icon  to add additional comparison values. To delete a comparison value, hover over the value and click the Delete icon
  .
.Checks if the field value does not match one or more provided values. Click Enter Value to provide each comparison value. Select if the field value must not match Any comparison value, or All comparison values. Click the Add Value icon  to add additional comparison values. To delete a comparison value, hover over the value and click the Delete icon
  .
. -
Any additional criteria are marked with And or Or, depending on the Select records where setting. To create criteria with different conditions, criteria groups can be added.
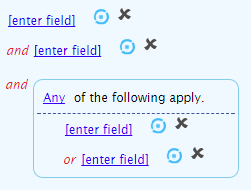
Each criteria group is managed the same as the top-level criteria, starting with the Select records where field and controls to add criteria and additional criteria groups (visible when hovering over the group header), plus an additional icon to delete the current criteria group.
The individual criteria in criteria groups are defined the same way as the criteria in the top level.
Groups can be added within criteria groups to provide even more detailed combinations.
For each criteria entry, including those in criteria groups, the Toggle Criteria icon ![]() can be used to temporarily disable the criteria, while the Remove Criteria icon
can be used to temporarily disable the criteria, while the Remove Criteria icon  deletes the criteria entirely.
Click Group Criteria to display the Group Criteria section.
Group Criteria
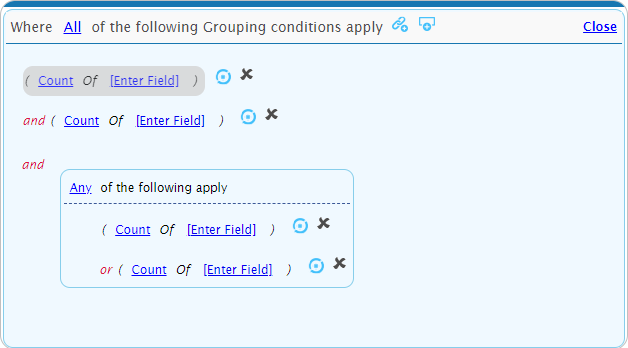
Criteria can be applied to restrict groups of data (aggregates) included in the query. The grouping is calculated after the Record Criteria have been applied.
The group criteria section is displayed by clicking Group Criteria in the Record Criteria section. Click Close to close the group criteria section.
At the top of the section, the Where field defines how the criteria should be applied.
To add filter criteria, click the Add Criteria icon ![]() to add a top-level criteria, or click the Add Group icon
to add a top-level criteria, or click the Add Group icon ![]() to add a group of criteria. The criteria structure is displayed in the window.
to add a group of criteria. The criteria structure is displayed in the window.

-
Select the aggregate type for the comparison field.
- Click Enter Field to select the field for the comparison. Once a field has been selected, click the field name to select a different field.
-
Click the third field to select the comparison type, and provide any necessary comparison values. Some comparison types may not be available due to the data type.
-
Any additional criteria are marked with And or Or, depending on the Select groups where setting. To create criteria with different conditions, criteria groups can be added.

Each criteria group is managed the same as the top-level criteria, starting with the Select records where field and controls to add criteria and criteria groups (visible when hovering over the group header), plus an additional icon to delete the current criteria group.
The individual criteria in criteria groups are defined the same way as the criteria in the top level.
Groups can be added within criteria groups to provide even more detailed combinations.
For each criteria entry, including those in criteria groups, the Toggle Criteria icon ![]() can be used to temporarily disable the criteria, while the Remove Criteria icon
can be used to temporarily disable the criteria, while the Remove Criteria icon  deletes the criteria entirely.
Sorting Controls
The results can be sorted by fields and aggregate values of fields.

One field is available by default, but additional fields can be added using the Add Order icon ![]() .
.
For each field, select if the sorting should be Ascending ![]() or Descending
or Descending ![]() .
.
If the sorting should be based on an aggregate value, select the type of aggregate.
Click Enter Field to select the field for sorting. To delete a field, hover over the field name and click the Delete icon ![]() .
.
Save Query Panel
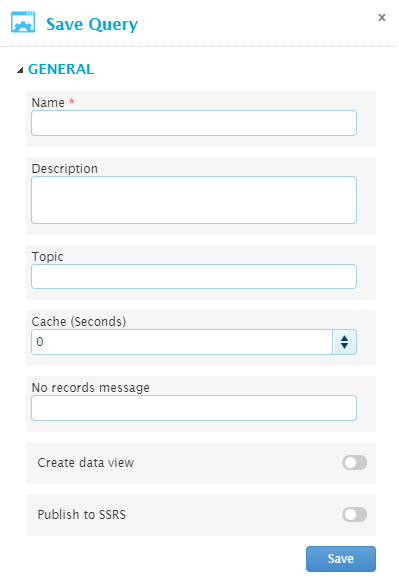
A custom query can be saved with a specific configuration. When using the query, settings can be changed for the specific requirements at the time. The changes are not saved unless the query is saved.
The Save Query panel opens to the right of the screen when selecting Save in the Query Designer window. Click X to close the panel again.
Click Save to save the query.
Query Results Window
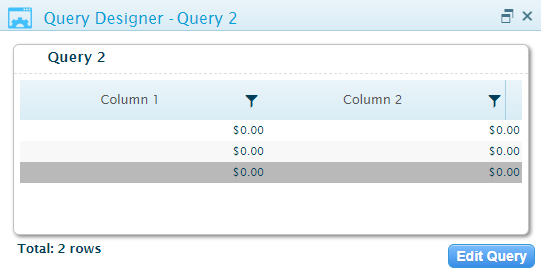
When executing a query, the Query Results window opens. This window displays the results with the current query configuration, and provides controls for sorting, filtering, and changing the view mode.
Columns can be sorted by clicking on the header, and filters can be applied using the Filter icon  .
.
The Control icon  to the left of query name opens the control panel, where the query can be refreshed, changed to a different view mode, or exported to an Excel file.
Click Edit Query to return to the Query Designer window.


